Crochet: Thankful Woman Throw Blanket
I am proud to present this post as part of a paid partnership with Knit Picks, a company I have patronized for many years and whose products and service I trust. All thoughts and opinions are my own, unedited and unaltered as always.
I’d like gratitude to be reflexive. Life taps under my patella with a hammer, my knee jerk reaction is gratitude, it swings a fist in my face, I blink and start in gratitude, it sends a biting wind, I break out in gratitude goose flesh. This is the kind of gentleness with which I’d like to receive the world. It is a way for me to turn the other cheek, compelling those who see it to ask “but, how?” I want to be like Corrie ten Boom, thanking God for the fleas in her bunk in Ravensbruck…how do you become that kind of human?
I’m getting there, I think, just in the act of keeping record. It isn’t a matter of finding the silver lining, it isn’t Pollyanna and the bright side of life. It is a deeply subversive and counter cultural choice to say thank you in all things, and somehow grow to mean it.
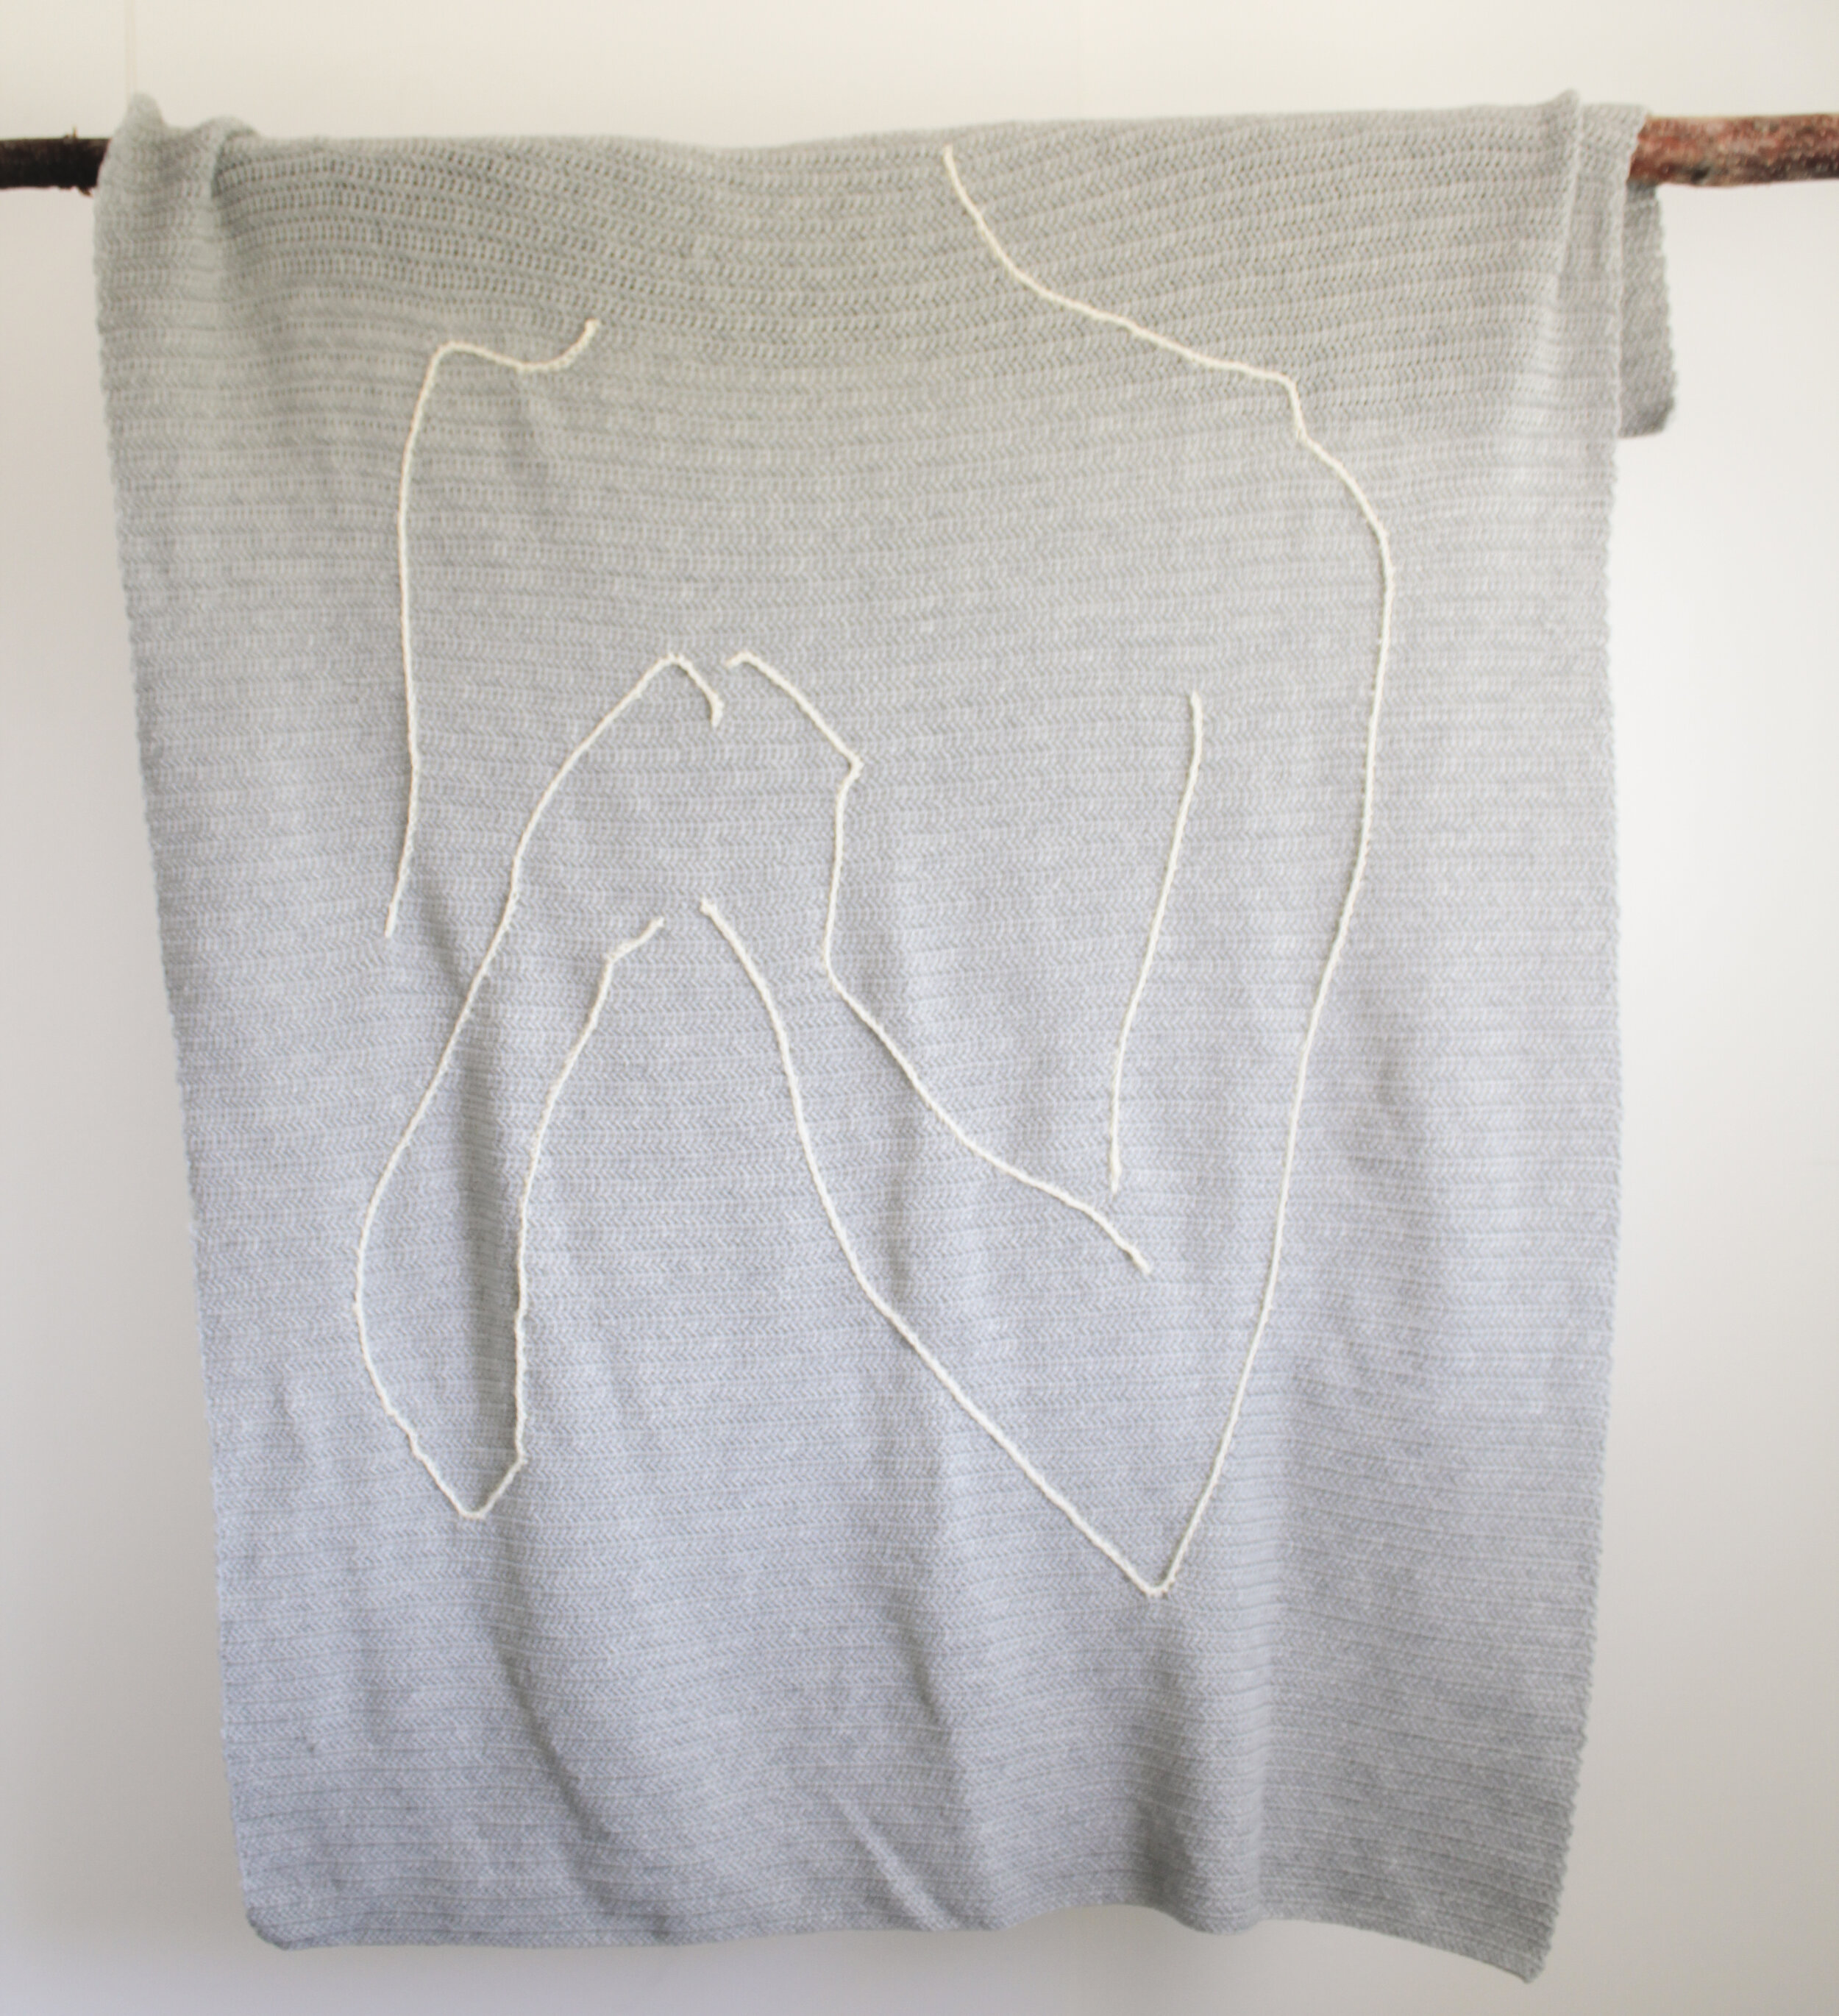
When I first saw Kayla Gale’s line art entitled “Thankful Woman” it seemed to express that inner moment of gratitude with such simplicity, I found it completely beautiful and captivating. I loved her work so much, in fact, I asked if she would do me the honor of drawing a bit of line art for my first tattoo, honoring my eldest daughter, which she graciously did. Several months later, Kayla allowed me to purchase the right to use her artwork for a new crochet design I was dreaming of. It has taken me several years to prioritize its completion, but I wouldn't go back and do it sooner. I think this design has come to fruition at just the right moment.
The Thankful Woman Throw Blanket is a simple design using surface crochet and grid line drawing to achieve the graphic look. I crocheted the piece in a go to basic yarn, Knit Picks Swish Worsted, a hearty, soft, versatile super wash merino wool I’ve enjoyed using for many projects over the years as an affordable merino with many lovely color options. I hope you enjoy it!

Materials
Knit Picks Swish Worsted in main color (MC) and contrasting color (CC). I used Dove Heather (MC) and White (CC). I used right about 2,000 yards of the MC and about 20 yards of the CC.
Several yards of contrasting yarn to create the line drawing grid.
Crochet hook size 5.5 mm/I/9 US or size needed to obtain gauge.
Fabric measuring tape
Tapestry needle
Gauge
14 st, 12 rows = 4” in herringbone double crochet
Sizing
50” by 60”
Abbreviations
chain: ch
herringbone double crochet: hbdc
repeat: rep
single crochet: sc
skip: sk
stitch: st
Special Stitches
herringbone half double crochet: yo, insert hook in stitch, yo over, pull up loop through stitch AND first loop on hook, yo, pull through two loops
Pattern
Using MC, ch 177
Row 1: 1 hbdc in 2nd ch from hook and in each ch across. Turn. 175 hbdc
Row 2: ch 2, 1 hbdc in each st across. Turn. 175 hbdc
Rows 3-180: Rep Row 2 until throw is 60” long. Break yarn and weave in ends.
Surface Crochet
Here comes the fun part!
To achieve the line art on the surface of the blanket, you will be using a technique called surface crochet. I used a surface slip stitch to surface crochet on my blanket.
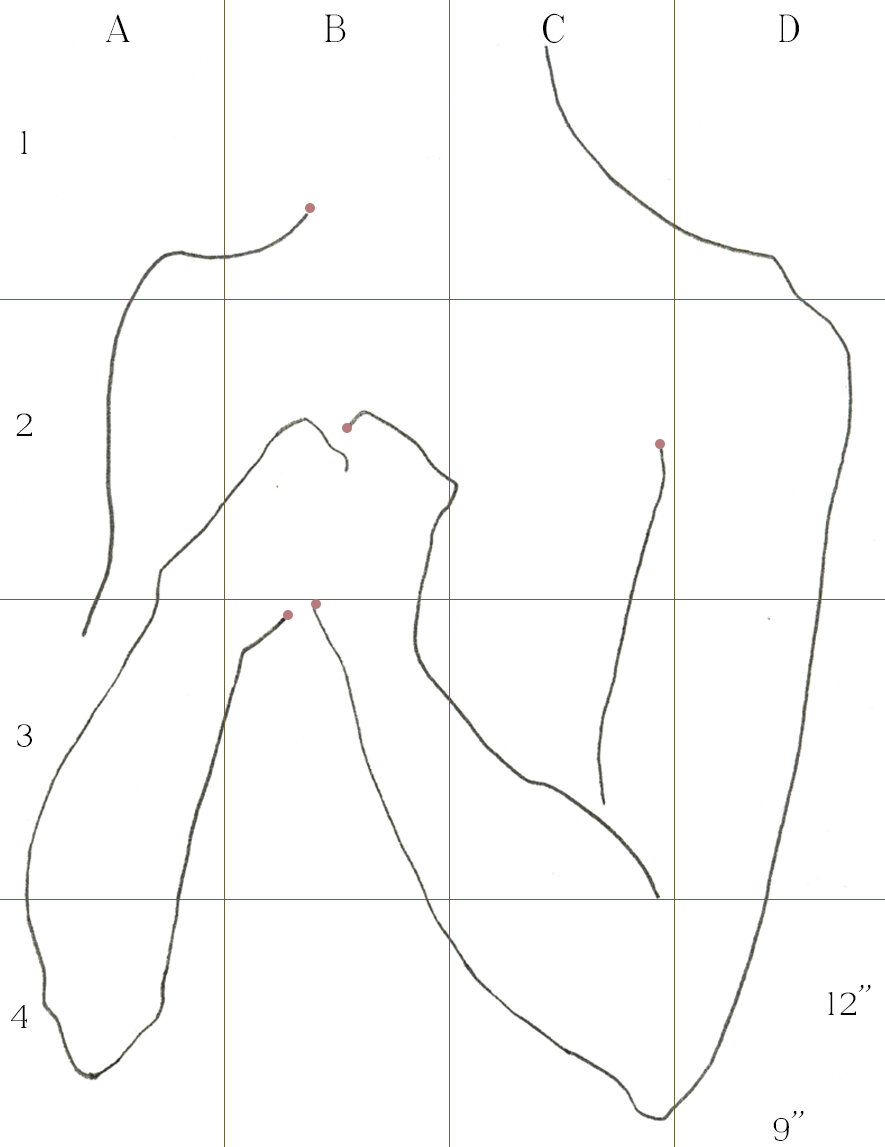
Before beginning to surface crochet, you will need to create the line art grid using the contrasting yarn to help guide you in your crochet “drawing”. The schematic below shows how to measure the placement of your grid lines. I started with the horizontal grid lines, beginning with the top line and working my way down.

Begin my measuring 18” (6” border + 12” grid line) from the top of the blanket and 7” in from the left edge. This is the point where the topmost horizontal line will begin. Make a little temporary slip stitch at this point by inserting your hook through two very close openings, down through one and up through the other, and drawing a loop through, then yarn over and draw a long loop through the loop on your hook, leaving the working tail free. The extra long loop will allow you to pull the grid line tight later, and keep the temporary slip stitch from unraveling as you work.

Now, you are going to measure 9” to the right, to create the first section of your horizontal line. Stretch the working tail along your tape measure, making sure to follow the crochet row to keep the line straight. Make another temporary slip stitch loop at the 9” mark, just as you did for the first temporary slip stitch.

Continue placing a temporary slip stitch every 9” 3 more times. There should be a 7” gap between the end of the horizontal grid line and the right edge of the blanket. Cut the yarn with about a 6-10 inch tail.
Starting back at the left edge, measure 12” down form the first horizontal line and repeat the instructions for creating the slip stitch across for the second horizontal line. Repeat once more for the third horizontal line. You should now have three horizontal lines in total.

You will now use the same exact process to add the vertical grid lines. I started at the left, working from the top to the bottom. Your starting point measures 16” over from the left edge and 6” down from the top edge. You shouldn't have to measure 12” down to get the next point to place a temporary slip stitch; simply work right on top of the slip stitches you made for your your horizontal lines, as they are placed where the horizontal and vertical lines should intersect. Measure 12” down from the bottommost horizontal line to place the last slip stitch of each vertical line. When all your lines are made, your blanket should look something like this:

You are ready to draw a beautiful, minimal piece of line art using surface crochet!
When using a line art grid, the whole picture is broken up into smaller rectangles. This allows you to focus on and complete just a small section of line at a time, using the grid to help you place the line on your drawing. If you have never done this before, clearly you never read Highlights magazine as a kid. You will be amazed at how accurately you can replicate an image using this method.
Looking at the drawing, you can see that there are only five lines that comprise the entire piece of art (meaning Kayla is really good at this kind of art!) You may begin with any of the five lines, but no matter where you begin, you will need to understand where to place it in relation to the grid to transfer the image correctly onto the surface of the blanket. For example, you might begin the right arm line. I have placed a small red dot where I began each line as I crocheted it to the surface of the blanket. The right arm line begins in the B3 box of the grid. As I began, I made sure to place the beginning slip stitch about 1/4 of the way from the edge of that box, and just slightly below the horizontal line above it. I then tried to create that triangular shape with the negative space between the line I was crocheting and the grid lines, then made a sharper angle moving down into box A3 to continue the arm line. Looking at the next grid line, I could gauge where I should be when I had to cross it. In this way, I made my way around the line section by section rather than trying to copy the whole thing. The lines help you keep things in correct proportion and relation to get a good copy of the drawing without having to visualize the entire drawing.
The process of working slip stitch surface crochet is very similar to what you did for the temporary slip stitches you made with he grid lines, except your working yarn will be UNDER the blanket.
Using CC, insert your hook at the point you wish to begin, pull up a loop from UNDER the blanket. With the loop on your hook, insert your hook again, moving in the direction you want you line to move. Pull up a loop through the blanket and then through the loop on your hook. Repeat this process, deciding carefully each time you insert your hook where you want you “drawing” to go next. When you get to a grid line, just work over it. You’ll be able to pull the grid line out from under the stitch later.
WikiHow has a decent photo tutorial on slip stitch surface crochet if this is confusing or if you’ve never tried it before. It is a a very simple stitch, but it can be tricky to do on a larger piece or with freeform drawing. Be patient and don’t be afraid to rip out a small section to get the curves right-I had to rip back at several points to perfect the drawing. Just think of it as erasing.

At the end of each of the five lines of the drawing, cut the yarn and weave in the ends carefully at the back of the blanket. If you are working carefully, the underside of the blanket shouldn’t show any yarn, just some puckering where the stitches were pulled up.

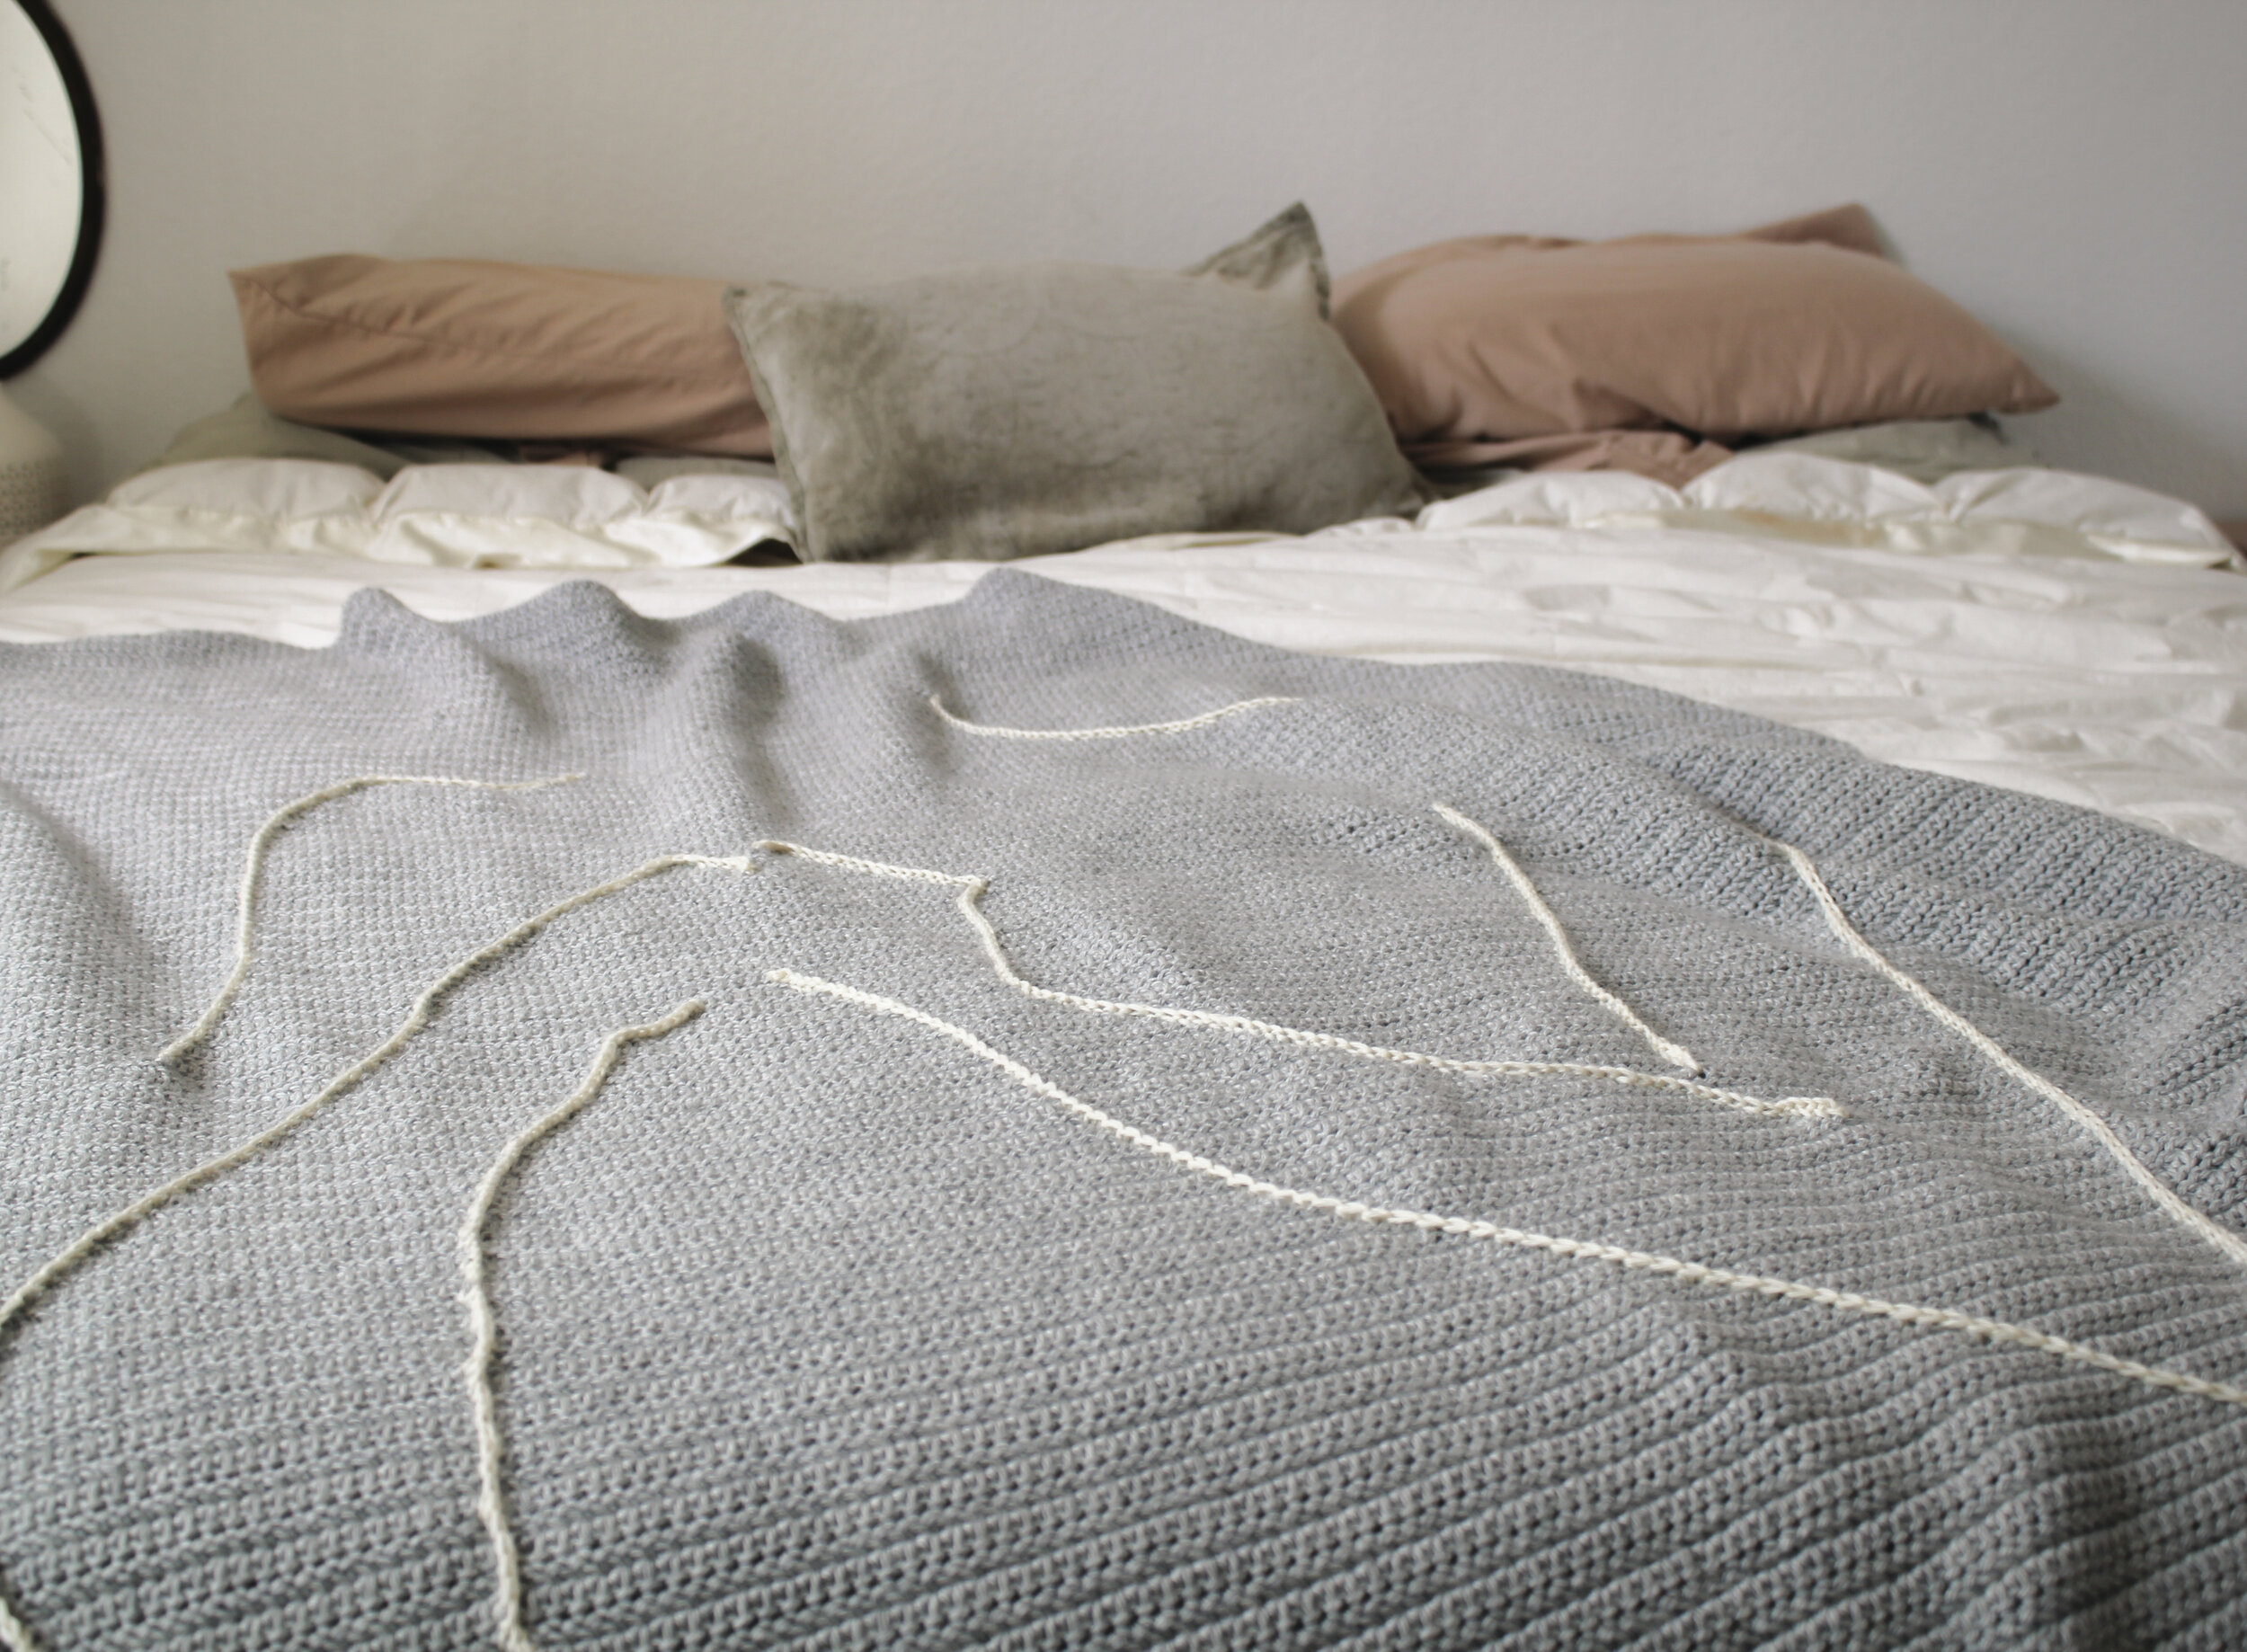
Now, you can go back and pull out the grid lines. Since the grid lines are done in loose slip stitches, you should be able to simply pull on the end until the whole length of yarn is free, repeating for each grid line. I would begin by removing the vertical lines if you worked the vertical line after the horizontal, since their slip stitches will be on top. I did not wet block the blanket, though I did do a really mild steam block on one end that had become a little misshapen as I worked. The throw blanket now lives on our bed, a daily celebration of gratitude, contentment, art and collaboration.
I am very proud of this piece, and extremely grateful to Kayla Gale for allowing me to use her art to make my own creative vision a reality. If you choose to make this project, I would love to see your progress! Please feel free to share pictures via Instagram, if you are a social media user. You can find my at Nicole_r_knutsen.
Save for later:

*Links are affiliate. I receive a small commission on purchases made through those links, which helps me continue to write and produce content. I only link products and/or companies I can unequivocally recommend based on my personal experience and research.